


 Roll the petals around using your fingers to loosen the fibers in the paper. You will see the paper starting to separate.
 Carefully separate the paper in half but do not separate it apart all of the way. Leave intact above the stem area.
 Place a ring of glue around your punched circle.
 Start placing the petals around the circle overlapping them a bit.
 Evenly space your petals if they are not already.
 Stack your Starburst punched pieces, staggering the petals slightly. You can add more then 2 layers for a fuller effect.
 You can use the Eline Pearls or whatever you wish to place in the middles. Buttons, tiny flowers or brads. Have fun peeling paper!!
 This LO is my reveal for Heartfelt Creations this week. The new Springtime Medley Stamp Collection is just wonderful. I love the way the stamps enhance the designs on my papers. So on this LO I used the Exotic Fuchsia. This Lo is also a Sneak Peek to the new February Swirlydoos Kit. It may reveal a little later than the normal last day of the month, due to Krissy being at CHA. Do each day, staring yesterday, each of the designers on the team will reveal one layout that they have done from the kit. This is my reveal from yesterday and I am followed by Robin. Go check out this thread here , and look for the reveals each day ending on Monday.
 I sprayed the Prima flower vine flowers with Glimmer Mist in Dragonfly.
 I enhanced the Dusty Attic chipboard with Lumiere paint and a few E-line it in Crystals from Prima.
 I created butterfly files at Swirlydoos to coordinate with the kit, printed, cut and enhanced with Rock Candy Stickles and ink. The Petaloo flowers were Glimmer Misted and stacked to create a full flower. I used my Seam Binding, dyed it with Alcohol ink in Lettuce and laced it through the eyelet set on both sides of the hand torn and distressed papers. Laced corset style. I created this How to Hand Dye Vintage Seam Binding Tutorial so that you could create your own ribbon in any color you choose. The Swirlydoos February Kit is still under wraps until reveal day, but I will say it is just divine. And if you are signed up for the early release program, then you are getting it the same time the designers are getting theirs. Go check it out!!


 Cut a length of seam binding. I like working with 1 yard pieces.
 Lay the piece of seam binding on a nonstick craft mat. This makes it easy to spray the ribbon while soaking up any excess spray mist to distribute it evenly.
 If you don't want ink stained fingers and nails, wear rubber gloves. Scrunch up the ribbon while squeezing it between your fingers to evenly distribute the color and to wrinkle your ribbon at the same time. You may choose to leave your ribbon flat. Smooth it out after scrunching.
 While using your heat gun to dry ribbon, move it around while scrunching until it is dry.
 For a variegated look, spray a different color on to the craft mat and dip parts of the ribbon into the puddle and start swishing it around the mat until all color is absorbed. Scrunch the ribbon slightly to distribute the new color.
 This is after drying.
 For an old worn vintage look, spray the ribbon with a browncolor, or you could take Tim Holtz a distress ink and smear it on the craft mat and swirl your ribbon through the ink until it has the amount of color you want. For further sheen, I also spray with Gold Glimmer Mist. Dry again after each misting.
 The beauty of coloring your own ribbon is you are able to match just about any color you want. I have colored ribbons the same color as some of the flowers just by misting them with the same sprays. Rayon Seam binding is hard to find in the store. Go to Zipperstop.com, or on Ebay to get a roll of 100 yards for less than 8 dollars. hug snug is the brand my grandmother used. It already has a beautiful sheen because it is made of Rayon. If you want flat ribbon, you could press it lightly with an iron. It is very versatile.

 2. Cut out petals any size and shape, and tear 3 sizes of circles for the middle. Notch the bottom of the petals and ink the edges of petals and circles. Shape circles so the edges flair upward like a saucer.
 3. Fold and crease petals wrong sides together, bring one notched bottom over the other and glue, scrunching the petal slightly. ink the creased middle.
 4. Glue stamen ( I inked with alcohol ink) to larger circle, when dry, stack and glue the circles with smallest on top. Looks like a "Lollypop Flower".
 5. Glue petals together to form a flower and glue Lollypop flower to middle. Let dry.
 6. Coat the whole flower generously with glossy medium.

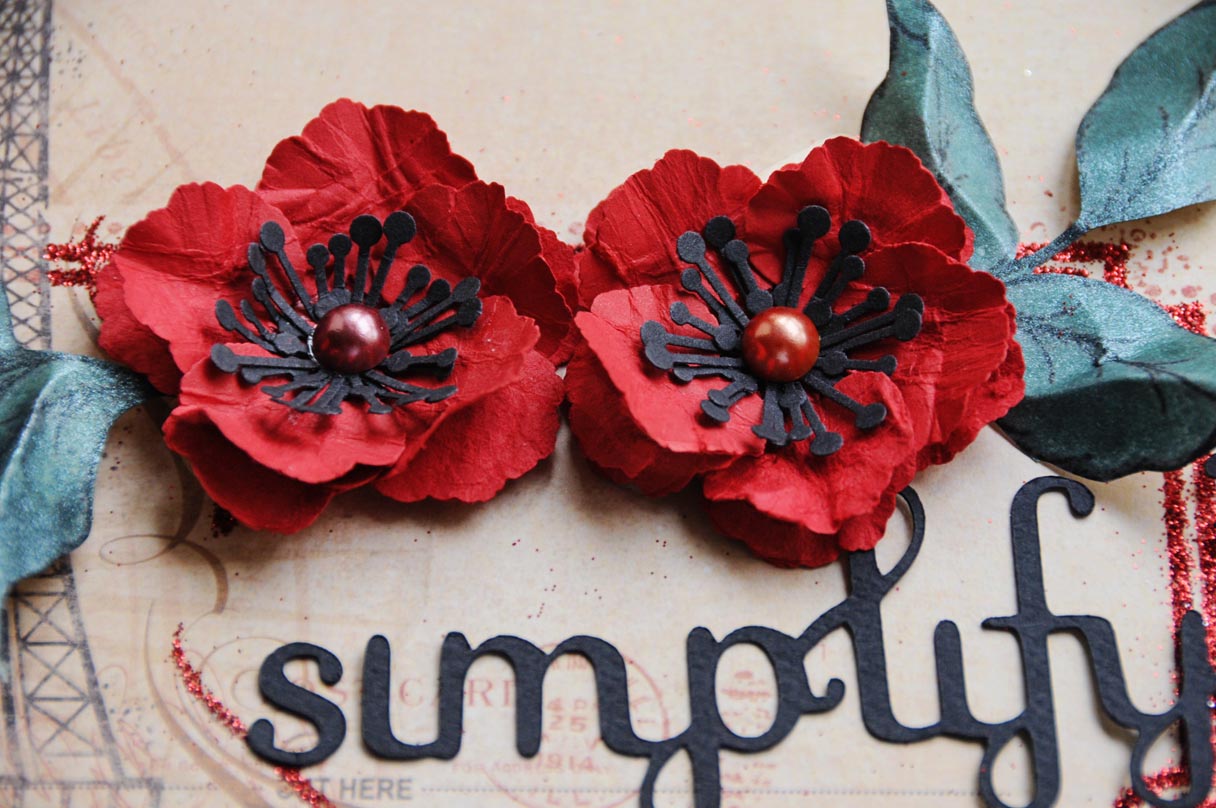
 And this is the LO, I used the flowers on.
 2.) Cut a piece of the card stock 10" by 8 1/2". Then cut a 2 1/2 inch strip off of the top of the cardstock. Take the 2 1/2 strip and bring the ends together without creasing the piece and slightly round the corners. When you open the strip you will have 2 perfectly round and even corners. See how I curved mine a little, I didnt want the curves flush with the sides of the body of the envelope. Now distress ink the edges of both pieces.
 3.) Using your stamps decorate the flap (top) of your envelope. I used a word stamp. on one end, an image on the other end and smaler stamps that fill in the empty spaces. I used a couple of colors for the smaller stamps. Those colors will coordinate with the papers I will be using on a LO that I will use the envelope on. Then use your border stamps to edge the bottom piece and I used some flourishes for the corners. Use your creative imagination. I think embossing all of your images would be beautiful also. Carefully see the placement of the eyelets. Place the small circle you punched behind the eylet before you set it. If you will be placing a photo over the bottom part of the envelope then you do not have to set the bottom eyelet as it will cause bulk.
 4.) This is a closeup of how your faux closure will look. Take the string and lifting the circle carefully, glue one end of the string behind it. When dry, tie in a figure 8 fashion. Do this step after your flap is glued to the bottom.
 5.) Glue your faux flap over the bottom piece of cardstock. I only glued the very top and left the edges alone to give it that authentic look. Now tie your closure..You are done. Use it on a LO. Think about the decorative possibilities...I hope you enjoy making your own Beautiful Envelope Embellie!!
 It goes great used on a background as seen in one of my past LO's.