Wednesday, November 30, 2016

"She Was Tired Layout" Yvonne Blair Art Girls Design Team for Impression Obsession

 This month, with Fall in the air, I was inspired to do a layout that was rustic and fresh and crisp with the smell of burning leaves in the air....BUT..I am in Florida..So I can only dream. And that is the beauty of Art. You can always dream. I used one of Yvonne Blairs stamps for this layout. The sentiment was perfect. My daughter was leaving for college and growing a new set of wings. We just let her fly. So she packed her bags and flew 3000 miles away to the other side of the country. She Was Tired was the perfect stamp as it echoed how she was feeling when she left for school and a new adventure,
To create the base to my layout, I used corrugated cardboard in 2 layers for the base. For the top layer, I peeled back and distressed the paper. Spritzing it with water helps with the process. I also used Lindys Stamp Gang Steam Punk Sepia Starburst spray to give it more color and shimmer.


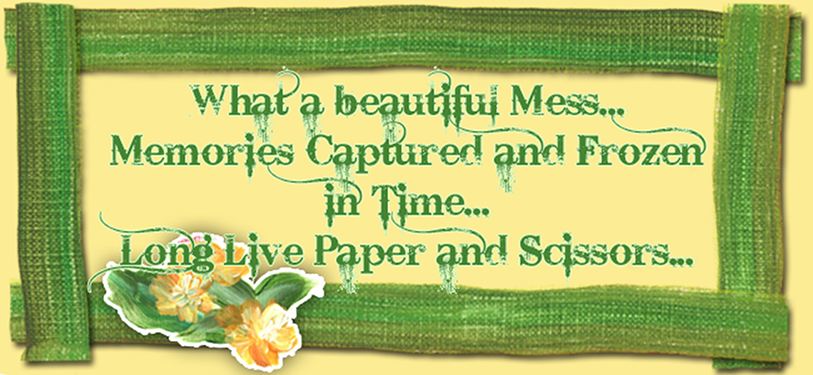
I stamped the sentiment on a piece of paper from the same collection I used to create the entire layout. I used a brown ink and then cut the sentiment in strips. I inked the edges of the strips, then adhered it to my layout.


All of the flowers on this layout were created from various dies in my stash. Prima, Sizzix, LaLa land Craft, and Spellbinders are some of the brands I used. I also used a Sun McGill punch for my flower middles. I layered about 6 pieces for each middle to make them look like dried up thistle flower pods. I used Lindys Stamp Gang sprays to color my flowers and leaves.


The frame was created from 2 different Sizzix dies. I just layered them to make it a bit dimensional. I cut a base from corrugated cardboard then cut the same 2 designs with paper. I adhered the paper to the cardboard then layered the 2 pieces and inked the edges.  This created a dimensional frame.


 Here is a closeup of some of the flowers. I spayed them with Lindy's Stamp Gang Spray and inked everything on the layout using Tim Holtz Distress ink. I love that the ink is water soluble and will spread if wet. It worked beautifully on this layout. I used Lindys Stamp Gang Steam Punk Sepia to enhance the ink,


Thank you for joining me this month and allowing me to share another piece of my he(art)...

xoxo

Lisa


Impression Obsession stamp by Yvonne Blair


OTHER PRODUCTS USED


Mini Album Dusty Attic


 The Dusty Attic Mood Board Challenge colors are so beautiful!!! I knew exactly what I wanted to do using the blue and green. I had been wanting to do a new mini album using those 2 colors. This was my chance! Did you know Dusty Attic has more than chipboard?? Yup... Flowers, stencils, pearls and texture paint are just more of the products I used on this mini album cover. I used neutral colored patterned paper for the album so that I can use color any way I wanted on it.


Here is a view of the spine. The mini album is a little over 1 inch thick. There is room to expand before the album is tied closed, so adding a few bulking items will not interfere with the closure. I used Prima marketing Salvage District paper for my mini. I  love that any color can be used beautifully on the paper.


Here is a close up of the cover. You can almost feel the rich texture created by the stencil and texture paste.  To prep the cover, used the Dusty Attic texture paste and distressed stencil. Once it was dried, I brushed the whole cover with clear gesso. I sprayed the cover lightly with a fine mist of water, then added my spray colors and let them bleed on the cover. once I was satisfied with the coverage, I stated to add my flowers and chipboard in layers, I love Dusty Attic Flowers, I chose to spray them with Lindys Stamp Gang colors that were similar to the flower colors. This added shimmer to the blooms.


I colored some seam ribbon with the same color sprays I used on the album cover. I added some beads and jewelry findings from my stash to the ends of the ribbon.


This is a view of the album when it is closed with the ties. There are only 4 pages in the album, but each one is interactive with flip-ups and pull outs. This creates lots of "real estate" for journaling and photos. All of the chip board was primed with white gesso, then sprayed with color mists. The title of the album was heat embossed with Embossing powder so that it would stand out from the sprayed chipboard.


Here is a view of the album opened up. I think I will color the some of the inside pages as well and add some more Dusty Attic Chipboard and texture. I used Kathy Orta's Hidden Hinge Binding system to adhere my 4 pages to. The base of my mini is a variation of Kathy's Foto Folio. I just did my own thing based on her


DUSTY ATTIC PRODUCTS USED:


OTHER PRODUCTS
Lindys Stamp Gang Sprays Used:
Ponderosa Pines Olive Starburst spray
Azure Sea Asters Starburst Spray
Delphinium Turquoise Starburst Spray
Desert Moon Turquoise Embossing Powder
Drop Dead Gorgeous Green Starburst Spray

Prima Marketing Products Used:
Salvage District Paper collection
Art Basics Art Stones large and small
Art Basics 3D Gloss gel
Art Basics Clear gesso


Sunday, November 6, 2016

Sharing some Florida Fall Photos.

As a Long Islander transplanted in Florida for the last 28 years, there is one thing I miss the most. AUTUMN. I miss leaf peeping, I miss the fireplace on a crisp Autumn night, I miss real pumpkin picking and the smell of burning leaves. I miss apple picking and fresh Apple cider. Yes I miss the food, but what I wouldn't do to go wandering deep into the woods on a gorgeous Fall day. So wanting to get that Fall feeling (kind of hard when it is still in the 80's) I decided to dress up the gazebo in my yard and create an Autumn theme to take photo's of my granddaughter Charlotte. There are hundreds of acres of woods that back up to my yard..I dare not venture in there to deep. You know..snakes alligators and spiders the size of small mammals....


 And then....She was out of there!!!!!


Saturday, November 5, 2016

Yvonne Blair Designs/Impression Obsession Stamps featuring Dusty Attic chipboard.

 I am happy to say that I have found my happy spot when it comes to journaling on a layout today. Yvonne Blairs designs for Impression Obsession just made my scrappy time so much easier. Whether you are a card maker, an ATC/Tag artist, or a Scrapbooker, The Card Sentiments set is very versatile. Couple that with other stamps from Yvonne's designs, and you have a journaling spot!
I created this layout. building my papers on corrugated cardboard for a rustic look. I love the stone look of the paper and wanted my layout to have some "weight". I chose my Dusty Attic chipboard "Life is better with Friends"title to compliment the stamped sentiments.


I cut apart a Dusty Attic chipboard from the Nesting Bracket Frame set. Used the bigger side to frame my photo and the smaller side to frame my journaling. This gave the whole layout some balance and continuity. I stamped the words on coordinating patterned paper, cut them apart, inked the edges and rearranged them onto the layout.


Here is a closeup of the opposite side of the layout where I used the other piece of the chipboard to frame my photo. The chipboard was heat embossed using Lindys Stamp Gang embossing powder in Midnight Brown. After it was heat embossed and cooled off, I dabbed a few spots with embossing ink and dusted it with Desert Moon Turquoise and heat embossed it again. This gave it a rustic 2 toned color that looks like stone.

-

I created my own flowers using coordinating paper and mixed them with Prima Marketing Flowers.


I hope you are inspired to grab a few of Yvonne's stamp sets and create your own sentiment by combining different stamps. The possibilities could be endless!! Sit back, have fun and create!


Yvonne Blair Designs/Impression Obsession:


Dusty Attic Chipboard:


Other Products used:

Lindys Stamp Gang Starburst Spray

Lindys Stamp Gang Embossing Powder

Prima Marketing Timeless Memories paper

Prima Marketing Flowers French Riviera

Prima Art Basics Art Stones small

Spellbinders Rose Creations die

Sizzix Garden Greens die and tag die


Sunday, October 30, 2016

3 Panel Photo Holder by Lisa Gregory

Hello Dusty Attic Lovers.  I simply adore the color palette in the Mood Board this month. I knew exactly what paper I would use, and exactly what Dusty Attic chipboard and paint I would use, I knew I wanted a set of small frames, and frilly swirls lighten up the design. Adding some beautiful Dusty Attic blooms added to the feminine charm for my 3 panel photo display piece.


This is a closeup of the top piece in the 3 panel display. All of the Dusty Attic chipboard that was used in this project was painted with Dusty In Colour Cashmere, dried, then Faded Denim was lightly dabbed on the pieces. When they were completely dried, the Clear Crackle Varnish was brushed on generously.


This is a closeup of the middle piece in the 3 panel display.


This is a closeup of the bottom piece in the 3 panel display.The piece are held together with small book rings in an antiqued bronze finish.  I just punched holes through the cardboard.


In this closeup, you can appreciate the layers on the panels. All of the paper was mounted on corrugated cardboard. I left it in the raw form to give the piece some warmth against the gray in the paper, and lets the yellow just pop off the page.


I printed up some butterflies from my digital files, cut them out, rubbed on some Stickles for some sparkle and randomly adhered a couple of them to each of the 3 panels.


I found these great decorative hangers from Anna Griffin. This one was perfect to hang and display my sweet photos of my granddaughter.


Thank you for joining me today. Wouldn't it be awesome to win some Dusty Attic product? Join us this month for the Mood Board Challenge and give it a try!! And come visit the Dusty Attic Blog often to get some fabulous inspiration form the amazing Design Team!!

Dusty Attic Products Used: